

Welcome to the Bruno SRE 2010 installation guide, designed for professional installers. This manual provides step-by-step instructions, safety guidelines, and essential information for a successful setup. Proper installation ensures warranty validity and optimal performance. Use this resource to guarantee compliance with safety standards and achieve a flawless installation process. Exploded diagrams are included for clarity.
Overview of the Bruno SRE 2010 Stairlift
The Bruno SRE 2010 is a high-quality, straight-rail stairlift designed for seamless integration into residential settings. It combines durability, comfort, and reliability, offering a practical mobility solution. The stairlift features a sturdy design, ensuring safe and smooth transportation for users. Its compact footprint minimizes staircase obstruction, while its ergonomic seating provides optimal comfort. The SRE 2010 is built to meet stringent safety standards, making it a trusted choice for enhancing accessibility in homes. This model is designed for straightforward installation and long-term performance.
Key Features and Benefits of the SRE 2010 Model
The Bruno SRE 2010 offers a blend of innovation and reliability, making it an excellent choice for residential stairlift needs. Its straight-rail design ensures a smooth and quiet operation, while the compact footprint minimizes obstruction on the staircase. The stairlift features a durable construction, ergonomic seating, and intuitive controls for enhanced user comfort. Designed with safety in mind, it includes robust braking systems and sensors to detect obstacles. The SRE 2010 is also energy-efficient and requires minimal maintenance, providing long-term reliability and performance. Its sleek design integrates seamlessly into any home decor, offering both functionality and aesthetics.
Pre-Installation Requirements and Safety Precautions
Ensure the staircase is structurally sound and clear of obstructions. Verify all components are included and undamaged. Always wear safety gear and follow manual guidelines strictly.
Essential Safety Guidelines for Installers
Before starting, always wear safety gear, including gloves and safety glasses. Ensure the area is clear of debris and obstacles. Never work near open flames or sparks. Verify all components are undamaged and compatible. Avoid overloading the system beyond its weight capacity. Use proper lifting techniques to prevent injury. Keep loose clothing tied back and long hair secured. Ensure proper ventilation when handling electrical components. Follow all local building codes and regulations. Double-check connections before testing. Never bypass safety features or skip recommended steps. If unsure, consult authorized Bruno personnel immediately.
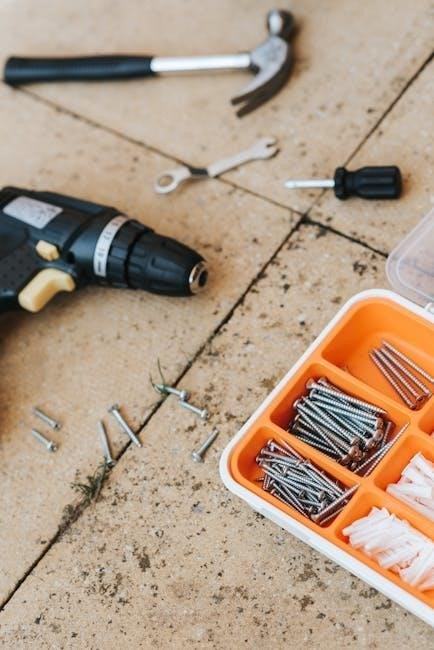
Tools and Components Needed for Installation
The installation requires specific tools: a drill, wrenches, screwdrivers, and a level. Essential components include the stairlift rail, chair assembly, motor unit, control box, and mounting brackets. Ensure all electrical components, such as wiring and circuit breakers, are compatible and undamaged. Verify the inclusion of safety sensors and stop switches. Refer to the manual for a complete list of parts and tools. Always use genuine Bruno components to maintain safety and warranty compliance. Proper organization of these items will streamline the installation process.

Step-by-Step Installation Process
This section offers a detailed, step-by-step guide for installing the Bruno SRE 2010, ensuring a smooth and safe setup. Use the provided tools and diagrams to follow each instruction carefully, guaranteeing proper installation and maintaining warranty validity.
Preparation of the Staircase and Surrounding Area
Before installation, ensure the staircase is clear of obstacles and debris. Inspect the stairs for structural integrity and address any unevenness or damage. Measure the staircase dimensions to confirm compatibility with the Bruno SRE 2010 model. Secure any loose carpeting or flooring to prevent tripping hazards. Clear the surrounding area to provide adequate workspace for installers. Check for nearby electrical outlets and ensure they meet the system’s power requirements. Proper preparation ensures a safe and efficient installation process.
Mounting the Rail and Chair Assembly
Begin by aligning the rail with the staircase, ensuring it is level and securely fastened using the provided brackets. Tighten all bolts according to the torque specifications in the manual. Next, attach the chair assembly to the rail, ensuring proper alignment and connection to the motorized components. Double-check all fittings for tightness and adjust as needed. Verify that the chair moves smoothly along the rail without obstruction. Refer to the exploded diagrams for clarity on component placement. Proper mounting ensures safe and reliable operation of the stairlift system.
Connecting Electrical Components and Testing
Connect the electrical components as outlined in the manual, ensuring all wires are securely attached to the appropriate terminals. Power the system and perform a series of tests to verify smooth operation. Check the motor, sensors, and controls for proper function. Test the stairlift’s movement, stopping mechanisms, and safety features. Refer to the troubleshooting guide if any issues arise. Once all components are confirmed to be working correctly, proceed to the final inspection and testing phase. Proper electrical connections and thorough testing ensure reliable and safe operation.
Troubleshooting Common Issues
Diagnose malfunctions by checking electrical connections, sensors, and mechanical components. Refer to the troubleshooting guide for solutions to common issues like unexpected stops or error codes.
Diagnosing Electrical or Mechanical Malfunctions
Start by inspecting electrical connections and sensors for damage or misalignment. Check the circuit breaker and ensure all components are securely fastened. Review the user manual for error codes or unusual behavior. Test the stairlift’s movement to identify mechanical issues like worn parts or lubrication needs. Use diagnostic tools to trace electrical faults, and verify wiring integrity. If problems persist, consult the troubleshooting guide or contact an authorized Bruno technician for professional assistance.
Resolving Common Installation Challenges
Address alignment issues by ensuring the rail is level and securely anchored. Tighten loose components and verify proper seating alignment. If sensors malfunction, clean or adjust them as needed. Refer to the troubleshooting guide for error codes. Lubricate moving parts if stuck, and ensure all electrical connections are secure. If challenges persist, consult the manual or contact an authorized Bruno technician for assistance. Proper tools and adherence to guidelines are essential for resolving installation difficulties effectively.

Post-Installation Maintenance and Care
Regularly clean the rail and lubricate moving parts. Inspect for wear and ensure proper alignment. Schedule annual professional check-ups to maintain performance and warranty compliance.
Scheduled Maintenance Requirements
Regular maintenance ensures optimal performance and safety. Clean the rail and lubricate moving parts every 6 months. Inspect for wear and proper alignment annually. Schedule professional check-ups to maintain warranty compliance and address potential issues early. Adhere to the manufacturer’s guidelines to prevent mechanical failures and ensure reliability. Proper upkeep extends the lifespan of the stairlift and guarantees user safety. Always consult the installation manual for detailed maintenance schedules and procedures.
Cleaning and Lubrication of Moving Parts
Regular cleaning and lubrication are crucial for smooth operation. Use a soft cloth to wipe down the rail and remove debris. Apply silicone-based lubricant to moving joints and hinges every 3 months. Avoid using harsh chemicals or abrasive materials that could damage components. Proper lubrication prevents wear and ensures quiet, efficient operation. Refer to the installation manual for specific cleaning and lubrication intervals to maintain optimal performance and extend the lifespan of the stairlift;

Warranty and Support Information
The Bruno SRE 2010 warranty is valid only if installed by an authorized dealer. Contact Bruno support for assistance or register your product for extended coverage.
Understanding the Bruno Warranty Terms
The Bruno SRE 2010 warranty ensures coverage for parts and labor under specific conditions. Installation must be performed by an authorized Bruno dealer to maintain validity. The warranty period varies depending on the product and usage, typically covering defects in materials and workmanship. Proper maintenance and adherence to installation guidelines are required to uphold coverage. Any unauthorized modifications or improper use may void the warranty. Refer to the official manual for detailed terms and conditions. Contact Bruno support for further clarification or assistance with warranty-related inquiries.
Contacting Authorized Bruno Dealers for Assistance
For professional installation and maintenance, contact an authorized Bruno dealer. Visit Bruno’s official website to locate a certified dealer near you. Ensure your warranty remains valid by using only authorized technicians. Dealers provide genuine parts, expert installation, and troubleshooting support. Contact them via phone or email for inquiries or service requests. Be prepared to provide your model number and details of any issues encountered. Bruno’s network of dealers ensures reliable assistance, maintaining your stairlift’s performance and safety. Reach out to them for all your installation and maintenance needs.
Visual Aids and Diagrams
This manual includes detailed exploded diagrams, enhancing clarity for installers. Digital versions offer zoom capabilities for precise visualization, aiding in accurate assembly and troubleshooting. On-screen viewing is supported.
Exploded Diagrams for Clarity
The Bruno SRE 2010 installation manual features detailed exploded diagrams, providing clear visual representations of component assemblies. These diagrams simplify the identification of parts and their relationships, ensuring precise installation. Digital versions allow for on-screen zoom, enhancing visibility and aiding in complex assembly steps. Exploded views are particularly useful for understanding how components fit together, reducing errors during setup. This visual approach is essential for both professional installers and DIY enthusiasts, offering a comprehensive guide to achieving a flawless installation. These diagrams are a cornerstone of the manual, ensuring clarity and accuracy.
On-Screen Viewing Options for Manuals
The Bruno SRE 2010 installation manual is available in digital formats, enabling convenient on-screen viewing. This feature allows users to zoom in on detailed diagrams and navigate easily through sections. The PDF version enhances readability, providing clear access to exploded diagrams and installation steps. On-screen viewing is particularly beneficial for professionals and DIY enthusiasts, as it simplifies complex instructions and ensures accuracy. This digital accessibility streamlines the installation process, making it more efficient and user-friendly.